With spring cleaning rolling around, it’s about time to dust out all of those tired old decorations you still have up. Everyone’s done it, and most of the time it’s because the concept of facing the rest of the year without those lively bits of color adorning your space just sounds drab and depressing.
With a few ribbons and a little bit of handiwork, it’s easy to turn your everyday space into your creative space. Read on for a few home decoration ideas that everyone—regardless of DIY experience—can make.
Liven Up Your Lighting
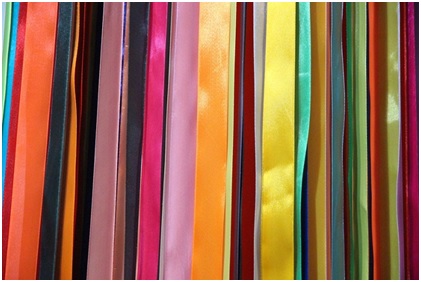 Looking to liven your space with themed mood lighting? All you need is a hot glue gun, some ribbons in your favorite color scheme, and a standard lamp shade.
First, measure the lampshade to determine how many ribbons you’ll need—this will depend on the width you’re using—and how long each cut should be. If you want to lay out a pattern using different types or colors of ribbon, do it now. Remember, the light will be shining through these ribbons into your room.
Once you’re ready, take your lampshade and place a dab of hot glue on the inside of the top, just below the edge. Press your first ribbon firmly onto the glue, making sure it’s secure, then repeat this on the bottom edge.
Make sure you’ve laid the ribbon straight before securing! Simply repeat this around the lampshade until you’ve covered the circumference and place it back over the light to enjoy the colorful effects of your creative prowess.
Pretty Pillowcases
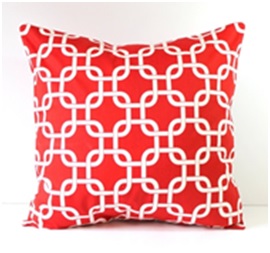
There’s a couple ways you can go about customizing the pillow covers around your home. If you’re feeling particularly crafty, a sewing machine is the way to go for securing ribbon to fabric. However, if you’re a bit more cautious, hot glue will work just as well.
The first step will be determining your pattern. A few simple suggestions are stripes, zig-zag, plaid, or trim. Regardless of the print, feel free to creatively exercise your imagination! For the best results, draw out the desired effect on the pillow cover before securing the ribbon down.
After you have a vision of your end product, you can start securing your ribbon. Double check that any overlapping parts are sewn or glued down in the proper order: the bottom layer first and the top layer second.
Customize Your Curtains
 If you have a window that needs covering and you just can’t find the right curtains from the local box store, consider a more vibrant alternative. Once you’ve measured out your window, cut your ribbons (mixing and matching encouraged) to twice the length of the frame plus an additional 6” to 12”. This will give you room for knotting, as well as a stylish length below the window ledge. Find the center of each length and place it behind a curtain rod, leaving about an inch of loop sticking out the bottom. Then, pull both ends over the rod and through the loop evenly, securing the ribbon to the rod and creating two hanging ribbon ends. Repeat until you have enough lengths to cover the window.
Alternatively, if you already have a set of curtains that needs a bit more flair, you can repeat the pillowcase design steps. You’ll need to pull the curtains down and lay them out flat before draw out your design on them, but the process is otherwise the same. The larger space here will give you a bit more creative room to play with wider lengths or patterns, so have a bit of fun with it!
Creative Containers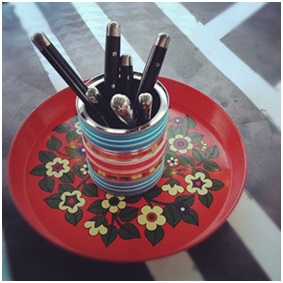
If you’ve been looking for a cute way to organize your pens, loose change, or even your ever-growing collection of lip balms, consider setting out some containers with a personal flair.
First, find an appropriate container for your purpose: this could be a mason jar, pencil tin, or an old, well cleaned can, depending on what you plan to store. After that, all you need are a few ribbons that strike your creative fancy and adhesive. Measure the circumference of your container, lay out a pattern, and secure on a flat surface before transferring to the container. This is a quick and easy way to spruce up your space with a bit of imagination and color!
Looking for More Inspiration?
Consider a few of the following fun projects to bring a bit more life into your living space:
Furniture edging
- Run a ribbon around a table, or along the outward facing side of your shelves, to add a personal touch.
Chair backs
- Create a basket weave through the bars on the back of a chair, or find an extra wide ribbon of a contrasting color to tie in a bow around a solid back for some classic elegance.
Wreath
- Use an old wire hanger for a frame and tie repeating knots of ribbon to create a fun wall hanging.
Wall design
- Purchase a set of tacks in the same color as your ribbon and secure a diamond pattern on your walls.
Whichever DIY project you decide to take on, using ribbons as home decoration is a great way to introduce some liveliness to your living area.
Author Bio
Roy Cunningham is a freelance writer and a DIY enthusiast from Los Angeles, California. With over 10 years of experience as an interior designer, he has helped renovate dozens of client homes to match their personal tastes. When he is not busy at work, he enjoys writing and publishing articles about his craft across digital media outlets.